Cake pops have taken the dessert world by storm! These bite-sized treats, made from crumbled cake mixed with frosting, then dipped in chocolate, are as fun to make as they are to eat. Whether you’re a beginner or a pro, this guide will walk you through everything you need to know about making the perfect cake pops—from basic recipes to creative decorating ideas.
In this article, you’ll learn:
- How to make classic cake pops from scratch
- The best ingredients and tools for the job
- Fun variations, troubleshooting tips, and expert tricks
- How to store and transport your cake pops without a mess
By the end, you’ll be ready to create these sweet treats with confidence. Let’s get started!
Introduction to Cake Pops
What Are Cake Pops?
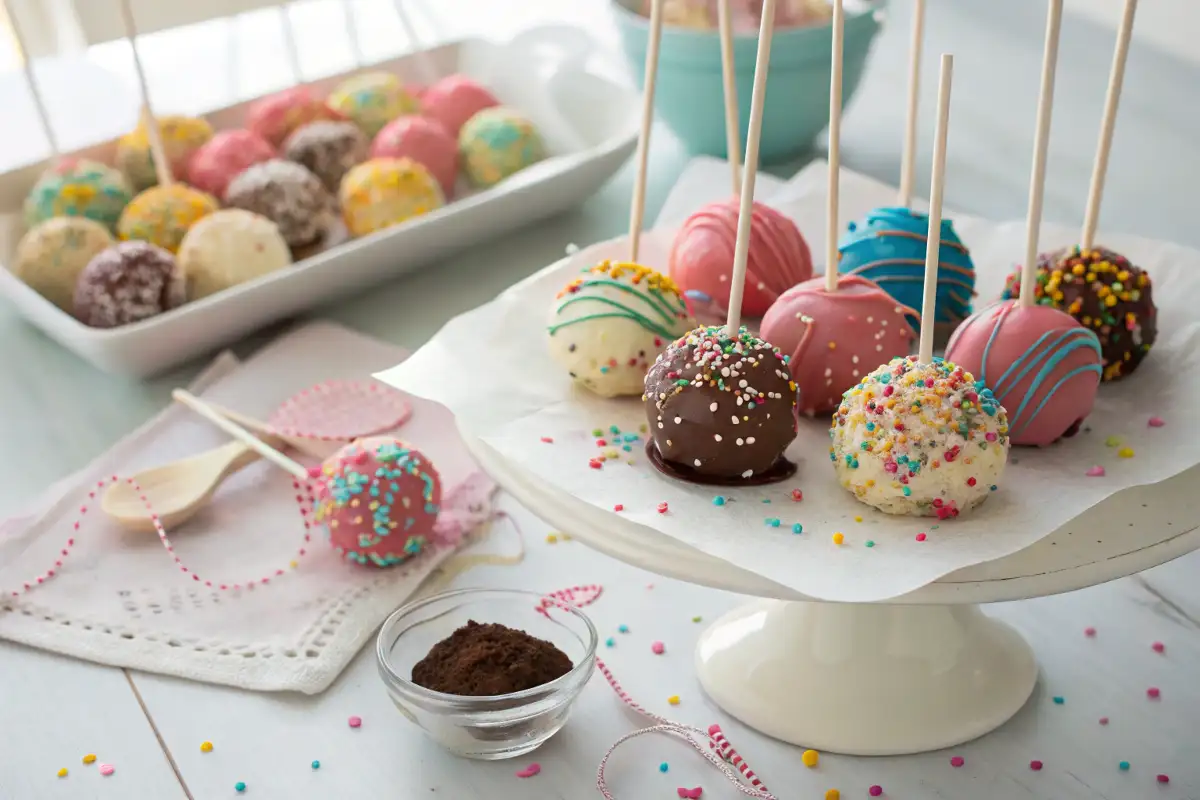
Cake Pops are small, bite-sized treats made from crumbled cake mixed with frosting, then coated in chocolate or candy melts. They are shaped into balls and placed on sticks, making them easy to serve and decorate for any occasion. Their soft texture, combined with a crunchy outer shell, makes them a fun and delicious dessert.
If you’ve ever craved cake in a fun, bite-sized form, cake pops are the answer! They’re small, round cake balls on sticks—like lollipops but even better. They combine soft cake crumbs with creamy frosting, then get coated in chocolate or candy melts for a delicious outer shell.
These little treats became popular thanks to their convenience and aesthetic appeal. Perfect for birthdays, parties, and special occasions, cake pops are not just delicious—they’re also highly customizable. You can make them in different flavors, coat them with vibrant colors, and add sprinkles, drizzles, or edible glitter for extra flair.
The Origin and Rise in Popularity of Cake Pops
Though cake balls have existed for years, the concept of cake pops skyrocketed when Bakerella, a popular baking blogger, introduced them in the late 2000s. Since then, they’ve become a staple in bakeries, coffee shops, and even home kitchens.
Why are cake pops so loved?
- They’re easy to serve—no plates or forks needed!
- They stay fresh longer than regular cake.
- They make great gifts and party favors.
- They offer endless design possibilities, from simple to elaborate.
With all these perks, it’s no wonder cake pops are a favorite for bakers of all skill levels. Now that you know what makes them special, let’s dive into the ingredients and tools you’ll need to create your own.
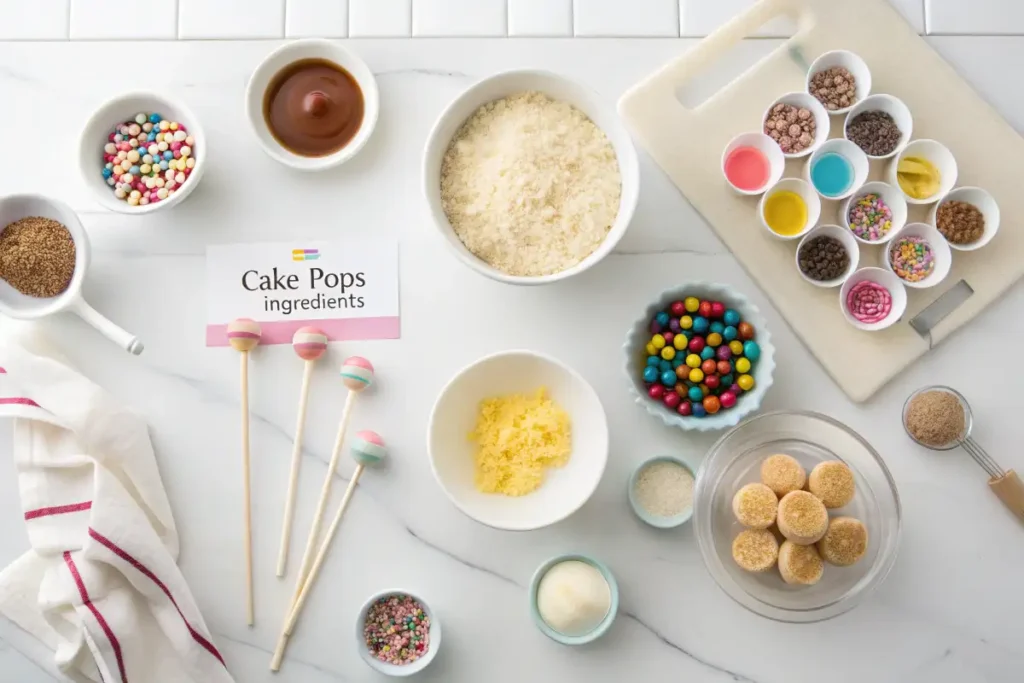
Essential Ingredients and Equipment for Making Cake Pops
Key Ingredients Needed
Before diving into making cake pops, it’s important to have the right ingredients on hand. The best part? You don’t need anything fancy—just a few simple ingredients!
Here’s what you’ll need:
- Cake – Any flavor works! You can use a homemade cake or a store-bought one.
- Frosting – This helps bind the cake crumbs together. Buttercream, cream cheese, or even ganache can work.
- Chocolate or Candy Melts – Used for coating the cake pops. Candy melts come in various colors and harden smoothly.
- Lollipop Sticks – These make cake pops easy to hold and give them their signature look.
- Sprinkles & Toppings – Add flair with edible glitter, crushed nuts, or colorful sprinkles.
While a homemade cake gives you full control over the taste, a store-bought cake mix works just as well when you’re short on time.
Necessary Tools and Equipment
Having the right tools can make the process smoother. Here are the must-haves:
- Mixing Bowl – For crumbling the cake and mixing it with frosting.
- Hand Mixer or Spoon – To blend the cake and frosting evenly.
- Cookie Scoop or Spoon – Helps make uniform cake balls.
- Baking Sheet – To place the cake balls while they chill.
- Microwave-Safe Bowl – For melting chocolate or candy melts.
- Cake Pop Stand or Styrofoam Block – To hold the pops upright while drying.
With all these ingredients and tools ready, you’re set to start making your cake pops! Let’s move on to the step-by-step process.
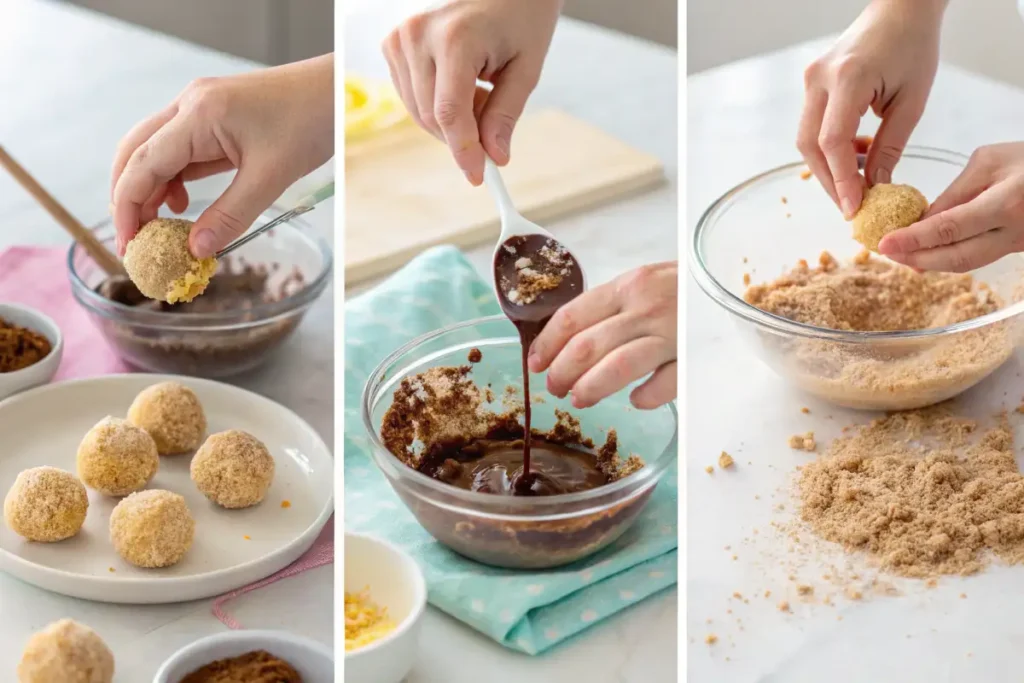
Step-by-Step Guide to Making Classic Cake Pops
Baking and Preparing the Cake Base
First things first—cake pops start with a fully baked cake. You can use any flavor, from classic vanilla to rich chocolate. If using a boxed mix, follow the instructions and let the cake cool completely before moving to the next step.
Once the cake is cool:
- Crumble it into fine crumbs using your hands or a fork.
- Ensure there are no large chunks—smooth crumbs will give the best texture.
Creating the Perfect Cake Crumb Mixture
Now, it’s time to mix in the frosting! Add a small amount (about 2-3 tablespoons) to start. Too much frosting can make the mixture too soft, while too little can cause it to crumble.
Steps:
- Mix the frosting with the cake crumbs using a spoon or your hands.
- The mixture should be moist enough to hold together but not too sticky.
- Test by rolling a small ball—if it holds its shape, it’s perfect!
Shaping and Forming Cake Balls
Once the mixture is ready:
- Use a cookie scoop or spoon to take equal portions.
- Roll them into smooth, round balls.
- Place them on a baking sheet lined with parchment paper.
- Chill in the fridge for 30 minutes or freeze for 15 minutes to firm up.
Inserting Sticks and Chilling the Cake Balls
Before dipping, secure the sticks:
- Melt a small amount of chocolate or candy melts.
- Dip the tip of each lollipop stick into the melted chocolate.
- Insert about halfway into a cake ball.
- Let them set in the fridge for another 10 minutes.
This extra step keeps the sticks in place and prevents them from slipping out later.
Dipping and Decorating Techniques
Now for the fun part—coating the cake pops!
- Melt your chocolate or candy melts in a microwave-safe bowl, stirring until smooth.
- Gently dip each cake pop, ensuring full coverage.
- Tap off excess chocolate by lightly tapping the stick on the edge of the bowl.
- Immediately add toppings like sprinkles before the coating hardens.
- Place upright in a stand or styrofoam block to dry.
And there you have it—classic cake pops! Once they’re fully set, they’re ready to serve or store. Up next, we’ll explore some exciting flavor variations and decorating ideas.Flavor Variations and Creative Ideas for Cake Pops
Cake Pops Timeline & Checklist – Stay Organized for Success
Timeline for Making Cake Pops Easily
Total Time: 2 hours (including chilling time)
| Step | Time Required | Description |
|---|---|---|
| Prepare the Cake | 30 minutes | Bake the cake and let it cool completely. A store-bought cake can also be used. |
| Crumble and Mix with Frosting | 10 minutes | Break the cake into fine crumbs and mix with a small amount of frosting until it holds together. |
| Form Cake Balls | 15 minutes | Roll the mixture into evenly sized balls and place them on a tray. |
| Chill the Cake Balls | 30 minutes | Refrigerate the cake balls to firm up before coating them. |
| Melt Chocolate or Candy Coating | 10 minutes | Melt the chocolate or candy melts for a smooth outer coating. |
| Dip the Balls and Insert Sticks | 15 minutes | Dip each cake ball into the melted coating and insert the stick for stability. |
| Decorate the Cake Pops | 15 minutes | Add sprinkles, nuts, or drizzled chocolate for extra flair. |
| Let Cake Pops Set | 20 minutes | Place them on a stand or styrofoam block to dry completely. |
Cake Pops Success Check-list
Essential Ingredients:
Cake (any flavor)
Buttercream or cream cheese frosting
Melted chocolate or candy coating
Cake pop sticks
Decorations (sprinkles, nuts, food coloring, etc.)
Necessary Tools:
Mixing bowl
Spoon or hand mixer
Baking sheet lined with parchment paper
Microwave or double boiler for melting chocolate
Cake pop stand or styrofoam block for drying
Key Steps to Ensure Perfect Cake Pops:
Crumble the cake finely and mix until it holds together
Roll the cake balls evenly to avoid dipping issues
Chill the balls before dipping to prevent crumbling
Dip the stick in melted chocolate before inserting to secure it
☐ Allow the coating to dry completely before serving
With this checklist, you can ensure your Cake Pops turn out perfect every time!
Flavor Variations and Creative Ideas for Cake Pops
Popular Flavor Combinations
While classic vanilla and chocolate cake pops are always a hit, exploring new flavors can make your treats stand out. Here are some crowd-pleasing combinations:
- Red Velvet with Cream Cheese Frosting: A rich, velvety base paired with tangy cream cheese creates a delightful contrast.
- Lemon Cake with Lemon Buttercream: Bright and zesty, this duo offers a refreshing twist.
- Carrot Cake with Cream Cheese Frosting: Spiced cake combined with creamy frosting delivers a comforting taste.
- Strawberry Cake with Vanilla Frosting: Sweet and fruity, this pair is perfect for springtime gatherings.
Experimenting with different cake and frosting pairings can lead to delightful discoveries. Don’t hesitate to mix and match to find your favorite combination.
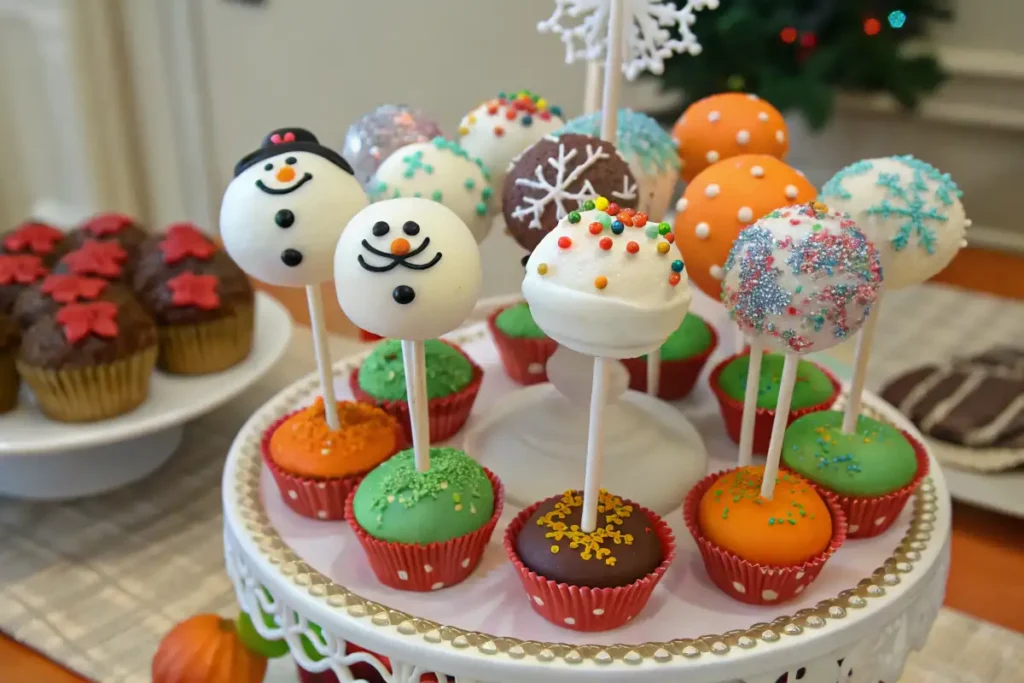
Seasonal and Themed Cake Pop Designs
These treats are not only delicious but also versatile canvases for creative designs. Tailoring them to specific themes or seasons adds a personal touch:
- Holiday Themes: Decorate with red and green sprinkles for Christmas or pastel colors for Easter.
- Birthday Parties: Customize with the birthday person’s favorite colors or characters.
- Weddings: Elegant designs with white chocolate and edible pearls can match the wedding theme.
- Halloween: Create spooky designs like ghosts or pumpkins using colored coatings and edible markers.
By aligning your cake pops with the occasion, you enhance their appeal and make events more memorable.
Incorporating Dietary Preferences (e.g., Vegan, Gluten-Free)
Accommodating dietary needs doesn’t mean compromising on taste. Here’s how to adapt cake pops for various preferences:
- Vegan Cake Pops: Use plant-based ingredients like flaxseed or applesauce as egg substitutes, and opt for dairy-free frosting and chocolate.
- Gluten-Free Cake Pops: Choose gluten-free flour blends for your cake base and ensure all other ingredients are certified gluten-free.
By considering these alternatives, you can ensure that everyone enjoys your Sweet pops, regardless of dietary restrictions.
For more delicious recipes, check out our recipe article.
Troubleshooting Common Cake Pop Issues
Preventing Cracks and Falls
Encountering cracks or cake pops falling off the sticks can be frustrating. To avoid these issues:
- Temperature Consistency: Ensure the cake balls and coating are at similar temperatures. If the cake balls are too cold, the coating may crack as it sets.
- Proper Stick Insertion: Dip the stick into melted coating before inserting it into the cake ball. This acts as glue, securing the stick in place.
- Adequate Chilling: After forming the cake balls, chill them until firm but not frozen. Over-chilling can lead to cracking.
By maintaining consistent temperatures and following these steps, you can achieve smooth, stable Sweet pops.
Achieving Smooth Coatings
A flawless coating enhances the appearance of your Sweet pops. Here’s how to achieve it:
- Proper Melting: Melt the coating slowly, stirring frequently to prevent overheating, which can cause clumping.
- Thin Consistency: If the coating is too thick, add a small amount of vegetable oil or paramount crystals to thin it out.
- Gentle Tapping: After dipping, gently tap the stick against the bowl’s edge while rotating the cake pop to remove excess coating evenly.
These techniques help in achieving a smooth, professional-looking finish.
Storing and Preserving Freshness
To keep your cake pops fresh:
- Short-Term Storage: Store at room temperature in an airtight container for up to two days.
- Long-Term Storage: For longer storage, place them in the refrigerator for up to a week or freeze them for up to a month. Ensure they’re properly wrapped to prevent moisture loss.
By following these storage methods, your cake pops will remain fresh and delicious until you’re ready to enjoy them.
FAQs
Use the right cake-to-frosting ratio, chill the cake balls before dipping, and dip the stick in chocolate first to secure it.
No, just refrigerate for 30 minutes before dipping. Freezing can cause cracks in the coating.
The cake balls are likely too cold. Let them sit for a few minutes after chilling before inserting the stick.
Uncoated cake balls: 2 days in the fridge, 1 month in the freezer.
Decorated cake pops: 2 days at room temp, 1 week in the fridge, 1 month frozen.
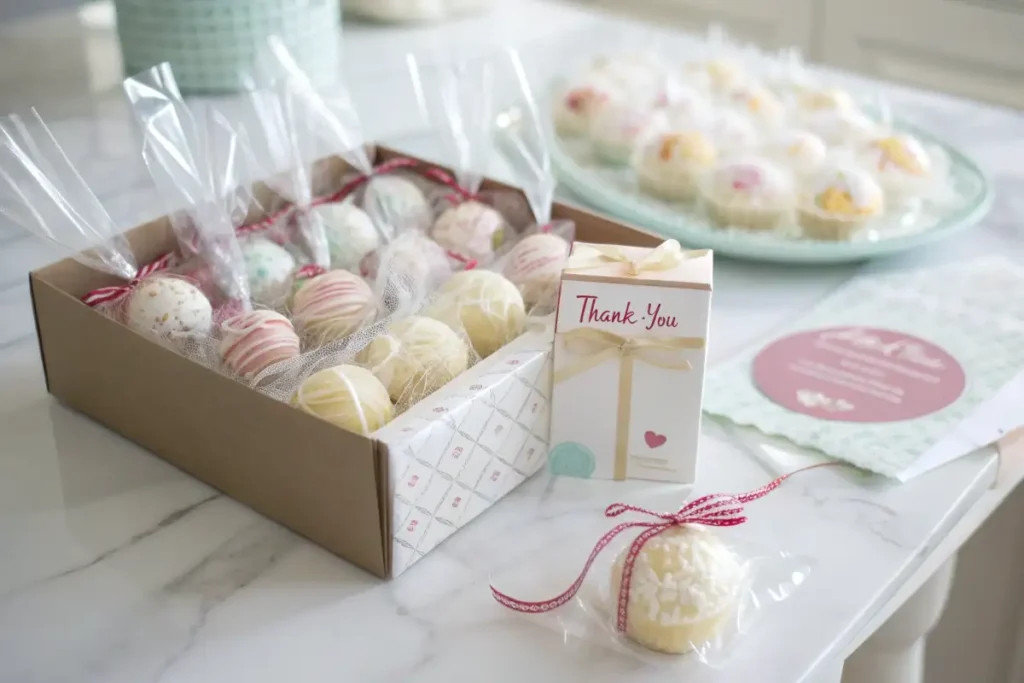
By following these tips, you can easily take your These treats anywhere without a mess.
Conclusion
Recap of Key Points
Making cake pops is a fun and rewarding process, whether you’re a beginner or an experienced baker. From choosing flavors to perfecting the coating, each step plays a role in achieving beautiful and delicious results.
Let’s quickly recap:
- Start with crumbled cake and a small amount of frosting.
- Shape into uniform cake balls and chill properly before dipping.
- Use melted chocolate or candy melts for a smooth coating.
- Get creative with flavors, decorations, and themed designs.
- Store correctly to keep them fresh and tasty.
Inspiration for Personalizing Your Cake Pops
Now that you know how to make These treats, it’s time to experiment! Try new flavors, fun decorations, and unique presentations. Whether you’re making them for a party, a gift, or just for fun, the possibilities are endless.
Want more baking inspiration? Check out our other delicious dessert recipes for even more creative ideas!
With these tips in mind, you’re all set to create the most delightful cake pops. Happy baking!
PrintCake Pops
- Total Time: 1 h + chilling time
- Yield: 24 cake pops 1x
Description
Cake pops are fun, bite-sized treats that combine crumbled cake and frosting, coated in a crisp chocolate shell. Perfect for parties, special occasions, or as a delightful snack, these handheld desserts are easy to customize with different flavors and decorations. They’re not just delicious but also a great way to use leftover cake!
Ingredients
For the Cake:
1 box of vanilla or chocolate cake mix (plus ingredients required on the box: eggs, oil, and water)
(or use 3 cups of homemade cake crumbs)
For the Cake Pop Mixture:
½ cup vanilla or chocolate frosting
For the Coating:
2 cups melting chocolate or candy melts (white, milk, or dark chocolate)
1 tbsp vegetable oil or shortening (optional, for smoother coating)
For Decoration:
Sprinkles, crushed nuts, or mini chocolate chips (optional)
Lollipop sticks
Instructions
Bake the Cake:
Prepare and bake the cake according to the package or homemade recipe instructions.
Let the cake cool completely before proceeding.
Crumble the Cake:
Use your hands or a food processor to crumble the cooled cake into fine crumbs in a large bowl.
Mix with Frosting:
Add ½ cup of frosting to the cake crumbs and mix until the texture is dough-like and holds together when pressed.
If the mixture is too dry, add a little more frosting (1 tbsp at a time).
Form Cake Balls:
Roll the mixture into small balls, about 1 inch in diameter.
Place them on a baking sheet lined with parchment paper.
Chill in the refrigerator for at least 1 hour or in the freezer for 15 minutes to firm up.
Melt the Chocolate:
In a microwave-safe bowl, melt the chocolate or candy melts in 30-second intervals, stirring between each, until smooth.
If the chocolate is too thick, add 1 tbsp of vegetable oil or shortening and stir well.
Attach the Sticks:
Dip the tip of each lollipop stick into the melted chocolate and insert it into the center of each cake ball (about halfway in).
Let it set for a few minutes.
Dip the Cake Pops:
Holding the stick, dip each cake pop into the melted chocolate, coating it evenly.
Gently tap off the excess chocolate.
Decorate & Set:
While the chocolate is still wet, sprinkle with decorations like sprinkles or crushed nuts.
Stick them upright into a foam block or place them on parchment paper to dry completely.
Enjoy!
Let the cake pops set at room temperature or in the fridge until the coating hardens.
Serve and enjoy!
Notes
Flavor Variations: Use red velvet, funfetti, or any flavored cake mix for variety.
Storage: Store cake pops in an airtight container at room temperature for up to 3 days or refrigerate for up to a week.
Freezing Tip: Uncoated cake balls can be frozen for up to 2 months. Thaw slightly before dipping in chocolate.
Drizzle Effect: Melt contrasting chocolate (white over dark or vice versa) and drizzle over the set cake pops for a decorative touch.
- Prep Time: 30 min
- Cook Time: 30 min (for baking the cake)
- Category: Dessert
- Cuisine: American
Nutrition
- Serving Size: 1 cake pop
- Calories: 150
- Fat: 7g
- Carbohydrates: 20g
- Protein: 1g
2 thoughts on “Cake Pops Recipe: The Ultimate Step-by-Step Guide”