
If you’ve ever tried to make gluten-free bread, you know it’s a whole different game from traditional wheat-based baking. Without gluten, bread can turn out dense, crumbly, or dry. But don’t worry! With the right ingredients, techniques, and recipes, you can bake a delicious, soft, and fluffy loaf that rivals any store-bought bread.
This guide will take you through everything you need to know about making gluten-free bread at home. We’ll start by understanding what makes gluten-free baking different, dive into essential ingredients, and walk through step-by-step baking techniques. You’ll also get troubleshooting tips, popular recipes, and answers to common questions.
Let’s get started!
PUnderstanding Gluten-Free Bread
What is Gluten-Free Bread?
Gluten-free bread is simply bread made without wheat, rye, or barley—grains that contain gluten. Gluten is what gives traditional bread its elasticity and chewy texture. Without it, baking becomes tricky, requiring alternative flours and binding agents to achieve the right consistency.
Gluten-free bread can be made from a mix of flours, such as almond flour, rice flour, oat flour, or sorghum flour, combined with binders like xanthan gum or psyllium husk. The result? A soft, flavorful loaf that caters to those with celiac disease, gluten intolerance, or anyone looking to cut gluten from their diet.
The Importance of a Gluten-Free Diet
For people with celiac disease, eating gluten triggers an immune response that damages the small intestine. Others experience non-celiac gluten sensitivity, leading to bloating, fatigue, or digestive issues. Because of this, avoiding gluten is essential for their well-being.
However, gluten-free diets aren’t just for medical reasons. Many people choose gluten-free baking for lifestyle and health benefits, believing it reduces inflammation, boosts digestion, and promotes gut health.
Challenges in Baking Without Gluten
Baking gluten-free bread isn’t as simple as swapping wheat flour for a single alternative. Without gluten, bread lacks elasticity, making it prone to:
- Crumbly texture – Without gluten to hold everything together, the bread can fall apart easily.
- Dryness – Gluten-free flours absorb liquid differently, often leading to a dry loaf.
- Dense consistency – Since gluten provides structure, gluten-free dough needs the right combination of ingredients to create an airy texture.
The good news? With the right mix of gluten-free flour blends, binders, and moisture-retaining ingredients, you can overcome these challenges and bake soft, fluffy bread.
Now that we understand what gluten-free bread is and why it’s essential, let’s move on to the key ingredients that make it work.
Essential Ingredients in Gluten-Free Bread
Baking gluten-free bread requires a unique mix of ingredients to replace what gluten naturally does in traditional baking. Without it, achieving the right texture, moisture, and elasticity takes a bit of science.
Let’s break down the key components that make wheat-free bread soft, fluffy, and delicious. By understanding the role of each ingredient, you’ll be able to create the perfect homemade gluten-free loaf every time.
Gluten-Free Flour Blends
Unlike wheat-based bread, where one type of flour is enough, gluten-free bread needs a mix of different flours to get the right texture and taste. Here are some common ones:
- Rice Flour – Light and mild, great for neutral flavor.
- Almond Flour – Adds richness and moisture but needs to be combined with starchier flours.
- Oat Flour – Naturally sweet and soft, helps create a tender crumb.
- Sorghum Flour – Adds a wheat-like taste and boosts nutrition.
- Tapioca & Potato Starch – These add stretchiness and help with softness.
A combination of these flours is usually best since each brings different qualities. Many pre-mixed gluten-free flour blends are available, making things easier for beginners.
Binders: Xanthan Gum, Psyllium Husk, and Alternatives
Since gluten acts as a natural binder, gluten-free bread needs other ingredients to hold everything together. Without them, the bread would fall apart.
- Xanthan Gum – A popular choice that helps create elasticity.
- Psyllium Husk – Absorbs water well, helping dough stay moist and flexible.
- Flax or Chia Seeds – When mixed with water, these turn into a gel-like texture that helps bind ingredients.
Using the right binder prevents dryness and crumbling, making the bread softer and chewier.
Leavening Agents: Yeast and Baking Powder
Since gluten-free bread lacks gluten’s natural ability to trap air, the right leavening agents are needed to help it rise properly.
- Yeast – Adds airiness and that classic bread flavor.
- Baking Powder or Baking Soda – Helps create lift, especially in quick breads.
Many recipes use a mix of yeast and baking powder to achieve the best results.
Liquids and Fats: Their Role in Texture and Flavor
Adding moisture is crucial in gluten-free bread since gluten-free flours tend to absorb more liquid.4$
- Milk or Dairy-Free Alternatives – Keeps the bread from drying out.
- Oil or Butter – Adds softness and enhances flavor.
- Eggs (or Egg Substitutes) – Help with structure and lightness.
Using enough liquid ensures the bread stays moist, preventing that dreaded dry, crumbly texture.
Now that we understand the key ingredients, let’s move on to the step-by-step process of baking the perfect gluten-free bread.
Step-by-Step Guide to Baking Gluten-Free Bread
Baking gluten-free bread may seem tricky, but with the right approach, you can make a perfect loaf every time. Let’s go through the essential steps to ensure success.
Preparing the Dough
Unlike traditional bread, gluten-free dough is more like a thick batter than a firm, kneadable dough. This is completely normal!
- Use room temperature ingredients – Cold ingredients can prevent proper mixing and rising.
- Measure carefully – Precision is key since gluten-free baking is more sensitive to ingredient ratios.
- Mix thoroughly – Because there’s no gluten to develop, you don’t need to knead the dough. Instead, mix until smooth and well combined.
Some bakers recommend letting the dough rest for 15–30 minutes after mixing. This allows the flour to absorb the liquid, improving texture.
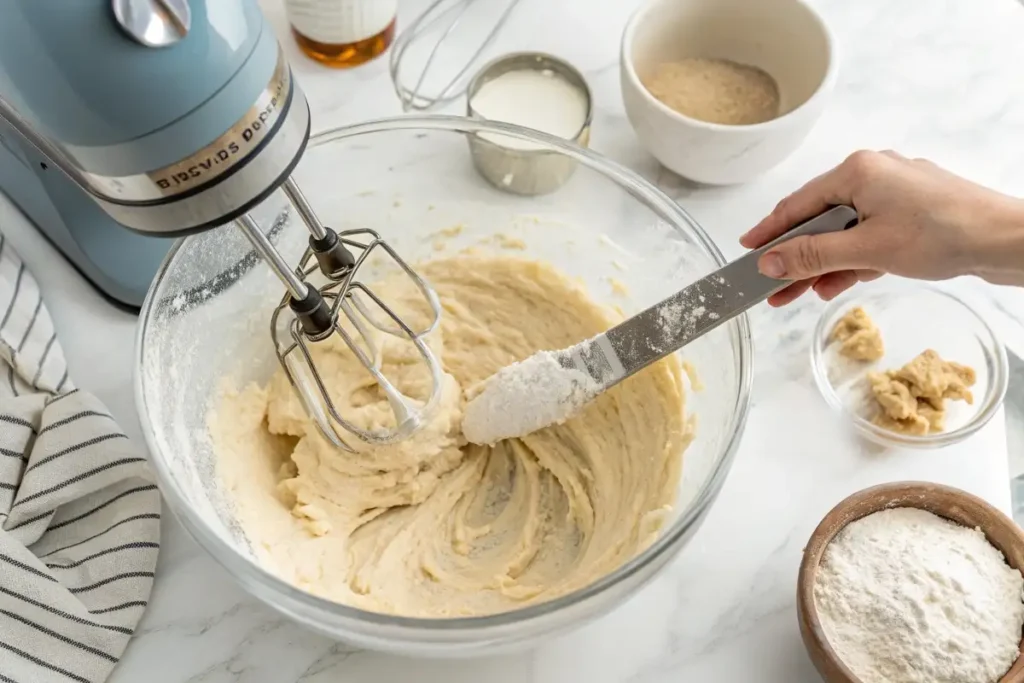
The Mixing Process
For gluten-free bread, mixing is crucial since there’s no gluten to create elasticity. Follow these tips:
- Use a stand mixer or hand mixer – This ensures even distribution of ingredients.
- Mix for at least 3–5 minutes – Unlike wheat dough, which needs gentle handling, gluten-free bread dough benefits from more mixing to properly hydrate the flours.
Proofing: Allowing the Dough to Rise
Letting the dough rise properly makes all the difference in gluten-free baking. However, since it lacks gluten, it won’t rise as much as regular bread.
- Use a warm place – Ideally, around 75–85°F (24–29°C) is best.
- Cover with a damp towel – This prevents the dough from drying out.
- Expect less rise than wheat bread – The final loaf will still be soft but slightly denser.
If the dough doesn’t rise, check that the yeast is fresh and that the liquid ingredients weren’t too hot (which can kill yeast).
Baking Techniques for Optimal Results
Once the dough has risen, it’s time to bake! Here’s how to get the best results:
- Use the right pan – A smaller pan (8×4 inches) gives better height since gluten-free bread doesn’t rise as much.
- Bake at the right temperature – Usually between 350–375°F (175–190°C).
- Cover with foil if browning too fast – Since gluten-free bread has more sugars, it can brown quickly.
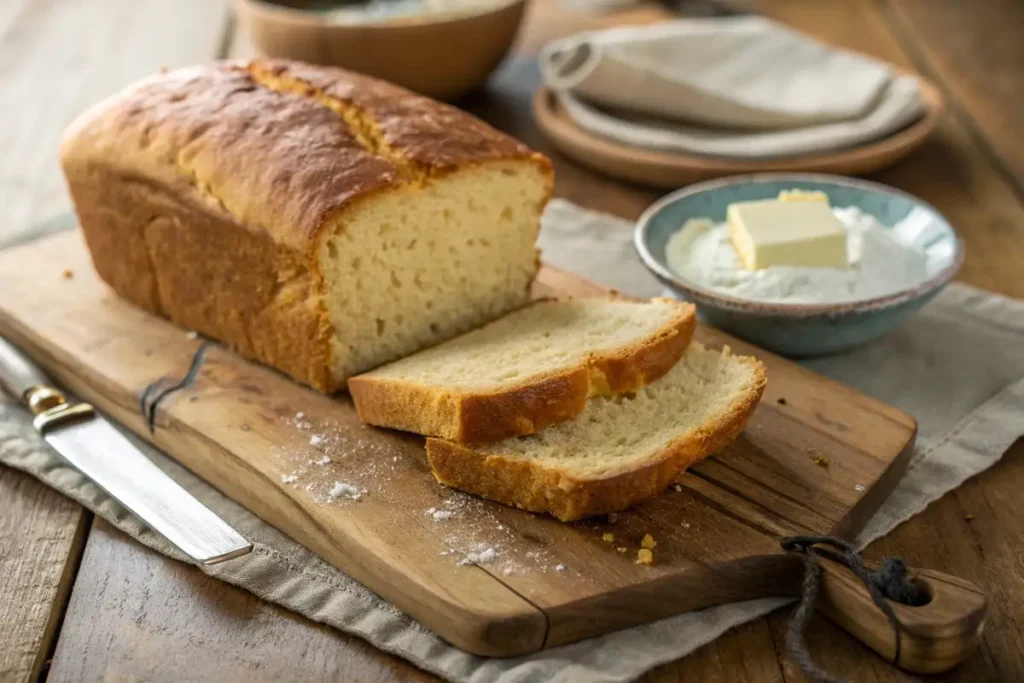
A key tip is to let the bread cool completely before slicing. Cutting too soon can make it gummy inside.
Now that you know how to bake gluten-free bread from scratch, let’s explore some popular recipes to try at home!
Popular Gluten-Free Bread Recipes
Baking gluten-free bread at home can be both fun and rewarding. Here are some favorite recipes that are sure to please your taste buds.
Artisan-Style Gluten-Free Bread
This rustic loaf boasts a crispy crust and a soft, airy interior. It’s perfect for those who crave a traditional bread experience without gluten.
Ingredients:
- 2 ½ cups gluten-free flour blend
- 1 ½ teaspoons xanthan gum (if not already in the flour blend)
- 1 teaspoon salt
- 1 packet (2 ¼ teaspoons) active dry yeast
- 1 ½ cups warm water (110°F/45°C)
- 2 tablespoons olive oil
- 1 tablespoon honey or sugar
Instructions:
- In a large bowl, combine the warm water, yeast, and honey. Let it sit for 5–10 minutes until it becomes frothy.
- In another bowl, whisk together the gluten-free flour, xanthan gum, and salt.
- Add the dry ingredients to the yeast mixture, followed by the olive oil. Mix until a sticky dough forms.
- Transfer the dough to a greased loaf pan. Smooth the top with a wet spatula.
- Cover the pan with a damp cloth and let it rise in a warm place for about 30–45 minutes, or until it has doubled in size.
- Preheat your oven to 375°F (190°C). Bake the bread for 30–35 minutes, or until the crust is golden brown and the loaf sounds hollow when tapped.
- Remove from the oven and let it cool completely before slicing.
Soft Gluten-Free White Bread
This loaf is ideal for sandwiches, offering a tender crumb and mild flavor.
Ingredients:
- 2 ½ cups gluten-free flour blend
- 1 ½ teaspoons xanthan gum (if not already in the flour blend)
- 1 teaspoon salt
- 1 packet (2 ¼ teaspoons) active dry yeast
- 1 ¼ cups warm milk (or dairy-free alternative)
- 2 tablespoons butter (or dairy-free alternative), melted
- 2 eggs, room temperature
- 2 tablespoons honey or sugar
Instructions:
- In a small bowl, combine the warm milk, yeast, and honey. Let it sit for 5–10 minutes until frothy.
- In a large bowl, whisk together the gluten-free flour, xanthan gum, and salt.
- Add the yeast mixture, melted butter, and eggs to the dry ingredients. Mix until a smooth batter forms.
- Pour the batter into a greased loaf pan. Smooth the top with a wet spatula.
- Cover with a damp cloth and let it rise in a warm place for 30–45 minutes, or until doubled in size.
- Preheat your oven to 375°F (190°C). Bake for 30–35 minutes, or until the top is golden and a toothpick inserted into the center comes out clean.
- Allow the bread to cool completely before slicing.
Gluten-Free Sandwich Bread
Perfect for everyday use, this bread holds up well to fillings and spreads.
Ingredients:
- 2 ½ cups gluten-free flour blend
- 1 ½ teaspoons xanthan gum (if not already in the flour blend)
- 1 teaspoon salt
- 1 packet (2 ¼ teaspoons) active dry yeast
- 1 ¼ cups warm water (110°F/45°C)
- 2 tablespoons olive oil
- 1 tablespoon honey or sugar
- 1 teaspoon apple cider vinegar
Instructions:
- In a large bowl, combine the warm water, yeast, and honey. Let it sit for 5–10 minutes until frothy.
- In another bowl, whisk together the gluten-free flour, xanthan gum, and salt.
- Add the dry ingredients to the yeast mixture, followed by the olive oil and apple cider vinegar. Mix until a smooth batter forms.
- Pour the batter into a greased loaf pan. Smooth the top with a wet spatula.
- Cover with a damp cloth and let it rise in a warm place for 30–45 minutes, or until doubled in size.
- Preheat your oven to 375°F (190°C). Bake for 30–35 minutes, or until the crust is golden and the loaf sounds hollow when tapped.
- Remove from the oven and let it cool completely before slicing.
Troubleshooting Common Issues in Gluten-Free Baking
Baking gluten-free bread can sometimes be challenging. However, understanding common pitfalls can help you achieve the perfect loaf. Let’s explore some typical issues and how to address them.
Why Didn’t My Bread Rise?
If your gluten-free bread didn’t rise as expected, consider the following:
- Inactive Yeast: Ensure your yeast is fresh. Expired yeast won’t ferment properly, leading to a dense loaf.
- Water Temperature: The water used to activate yeast should be warm, not hot. Ideally, it should be between 105°F and 115°F (40°C to 46°C). Water that’s too hot can kill the yeast, while water that’s too cold won’t activate it.
- Rising Environment: Dough needs a warm, draft-free place to rise. If your kitchen is cold, consider placing the dough in a slightly warm oven (turned off) or near a warm appliance.
Dealing with Gummy or Dense Textures
A gummy or dense texture in gluten-free bread can be disappointing. Here’s how to prevent it:
- Underbaking: Ensure the bread is baked thoroughly. An underbaked loaf can be gummy inside. Use a kitchen thermometer to check; the internal temperature should reach about 200°F (93°C).
- Excess Moisture: Too much liquid in the dough can lead to a dense texture. Measure ingredients carefully and avoid adding extra liquid beyond what’s specified in the recipe.
- Improper Flour Blend: Using a single type of flour can result in poor texture. A blend of gluten-free flours provides a balance of proteins and starches, leading to a better crumb.
FAQs
Gluten-free bread is made without wheat, rye, or barley, which contain gluten. Instead, it uses alternative flours like rice flour, almond flour, oat flour (certified gluten-free), sorghum flour, or tapioca flour. Many gluten-free breads also include binders like xanthan gum or psyllium husk to help with texture and structure.
Not all sourdough bread is gluten-free. Traditional sourdough made from wheat still contains gluten, even though the fermentation process breaks down some gluten proteins. However, there are gluten-free sourdough recipes that use gluten-free flour blends, making them safe for those with celiac disease or gluten intolerance. Always check the label or make your own using certified gluten-free ingredients.
It depends on your dietary needs. For people with celiac disease or gluten sensitivity, gluten-free bread is essential. However, for others, it may not always be “healthier” since some store-bought versions contain more sugar, starches, or preservatives to improve texture and taste. If you’re looking for a healthier gluten-free bread, choose whole grain varieties or make your own at home.
If you’re looking for bread with lower gluten content but not entirely gluten-free, consider:
Spelt Bread – Contains gluten but in a more digestible form.
Einkorn Bread – Has less gluten than modern wheat varieties.
Rye Bread (100% Rye) – Lower in gluten than wheat but still not safe for celiacs.
Traditional Long-Fermented Sourdough – Fermentation reduces gluten but doesn’t eliminate it entirely.
Conclusion
Baking gluten-free bread at home may take a bit of practice, but with the right ingredients and techniques, you can create delicious, soft, and flavorful loaves. By understanding the role of each ingredient, following the right baking steps, and troubleshooting common issues, you’ll be able to make gluten-free bread that rivals any store-bought option.
Whether you’re making an artisan-style loaf, a soft sandwich bread, or a classic white bread, experimenting with different flour blends and baking methods can help you find your perfect recipe. Don’t forget to store your bread properly to keep it fresh for longer!
For more delicious gluten-free recipes, check out our collection of gluten-free desserts, snacks, and breakfast ideas to expand your baking skills. Happy baking!
Print
Gluten-Free Bread
- Total Time: Total Time: 1 h 30 min
- Yield: 1 loaf 1x
- Diet: Gluten Free
Description
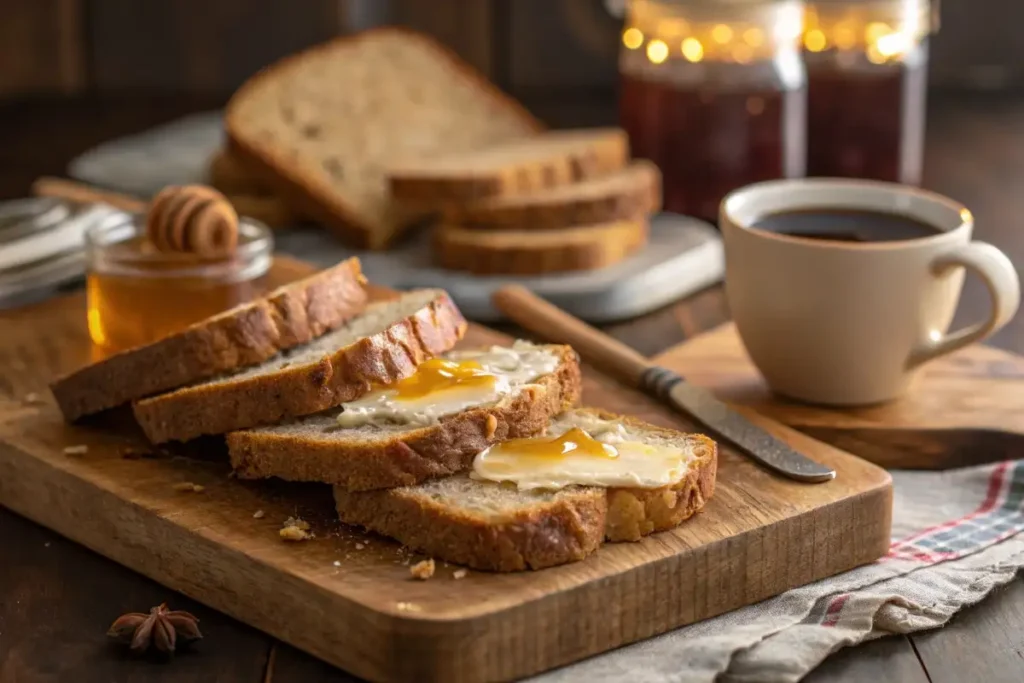
This gluten-free bread is soft, fluffy, and perfect for sandwiches or toast! Unlike many store-bought options, this homemade version is flavorful, has a great texture, and is easy to make. Whether you’re gluten-sensitive or just looking for a healthier alternative, this recipe will satisfy your cravings. It’s dairy-free and can be customized with your favorite add-ins like seeds or herbs.
Ingredients
- 2 ½ cups (315g) gluten-free all-purpose flour (with xanthan gum)
- 1 cup (120g) almond flour
- 1 tbsp baking powder
- 1 tsp salt
- 1 tbsp sugar or honey
- 1 tbsp apple cider vinegar
- 2 tsp instant yeast
- 3 tbsp olive oil or melted butter
- 1 ¼ cups warm water (110°F/43°C)
- 2 large eggs (room temperature)
Instructions
- Prepare the Dough: In a large mixing bowl, whisk together the gluten-free flour, almond flour, baking powder, salt, and sugar.
- Activate the Yeast: In a separate bowl, combine warm water, yeast, and apple cider vinegar. Let it sit for about 5 minutes until foamy.
- Mix Wet Ingredients: Add the olive oil and eggs to the yeast mixture and stir to combine.
- Combine Ingredients: Gradually mix the wet ingredients into the dry ingredients. Stir well until a thick, sticky batter forms (not like traditional dough).
- First Rise: Transfer the batter to a greased 9×5-inch loaf pan. Smooth the top with a spatula. Cover with plastic wrap and let it rise in a warm place for 45–60 minutes or until it doubles in size.
- Bake: Preheat your oven to 375°F (190°C). Bake for 35–40 minutes or until the top is golden brown and the loaf sounds hollow when tapped.
- Cool & Serve: Let the bread cool in the pan for 10 minutes, then transfer it to a wire rack to cool completely before slicing.
Notes
- Storage: Keep in an airtight container at room temperature for up to 3 days, or refrigerate for up to a week.
- Freezing: Slice and store in a freezer bag for up to 3 months. Toast directly from frozen!
- Variations: Add chia seeds, sunflower seeds, or rosemary for extra flavor and texture.
- Dairy-Free Option: Use coconut oil instead of butter
- Prep Time: Prep Time: 15 min
- Cook Time: Cook Time: 35–40 min
- Cuisine: Cuisine : Gluten-Free, American
Nutrition
- Serving Size: 1 slice (out of 12)
- Calories: 160
- Fat: 7g
- Carbohydrates: 20g
- Fiber: 3g
- Protein: 4g
1 thought on “Gluten-Free Bread That Tastes Like the Real Thing – Try It Now!”